Machine sites
Finding a site
Section titled “Finding a site”The machines hold some dead worlds (rocky, metal, icy and desert): about one in three near Sol, more further out, each with one to three machine sites. In Sol they hold only Mercury and the Moon. Scan the world and they show as red marks on the planet map. Pick one to set a landing spot 300 m off it, land, and walk in. Within 600 m the site wakes.
The Spire and its waves
Section titled “The Spire and its waves”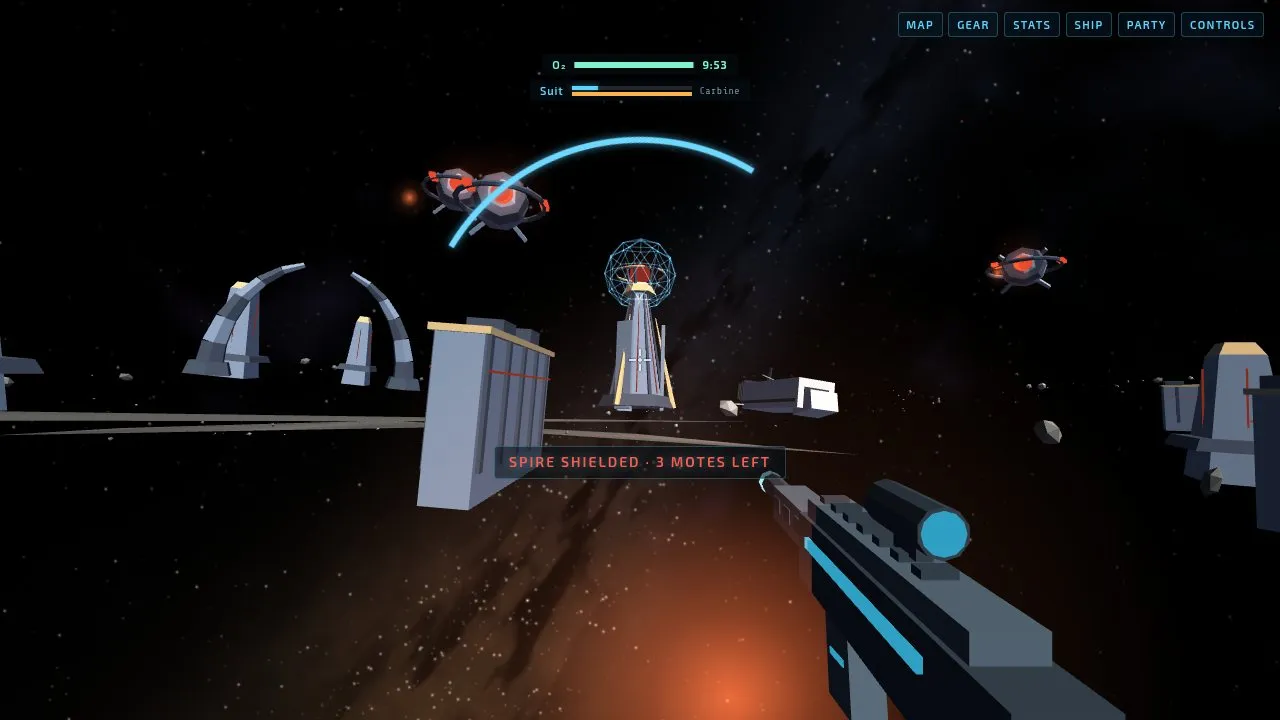
At the centre stands the Spire. It sends out waves of machines and can’t be hurt while any of the wave is still up. When a wave is down the Spire is exposed for 12 seconds: hit its core for double damage. Its beam glows for a moment, locked on where you stood, then fires: keep moving and it misses.
Destroy the Spire and the site is cleared: a bonus, experience and an item, sure to be Fine or better. You can’t clear the same site again for a day. Walk 900 m away or leave the world and the fight ends.
The machines
Section titled “The machines”- Motes hover, circle you 10 to 18 m out, dive in, and fire slow bolts at your chest. A step aside dodges them.
- Hollowed climb out of the ground and run at you, faster than you walk but not faster than you run. A few metres off one stops to prime, then bursts, hurting everyone near. Shot while priming it takes double, and goes off among the other machines instead.
- Striders keep their distance and charge a beam every few seconds. Their plates soak your hits; shoot the core hanging underneath. Hit the core hard during a charge and it staggers.
- The Harvester: at a dangerous site, a Spire badly hurt calls up a four-legged walker 9 m tall. Get too close and it rears and stamps, hurting everything near. Every so often it fires a volley of beams, then its vents stand open for five seconds: hit them for double. It always drops gear, usually Rare or better.
About a third of sites are nests: no Spire, but a ring of three to five Hives, each letting out Hollowed while you’re near. Shoot a Hive’s mouth while it’s open for double damage. Destroy the last Hive to clear the nest.
Cover and caches
Section titled “Cover and caches”Every site has walls, monoliths, ribs and a wreck. They stop shots, both yours and theirs, and the machines walk round them.
Two or three salvage caches are hidden among them. Use one and it takes a few seconds to crack, and sets off an alarm: Hollowed come up out of the ground round it. Cracked, it pays credits, experience and an item, Fine or better, once a day for each cache. Caches stay after the site is won, until you leave.
Your suit
Section titled “Your suit”Your suit’s shield takes hits first and recharges after three quiet seconds. Under it, the suit’s integrity only goes down until you have it repaired at a station. The edge of the view reddens when you’re hit, and an arc points to what hit you.
When integrity runs out you get a second wind: destroy something within ten seconds and your shield comes back, though the next hit through it puts you down. If you go down, or run out of oxygen, you come round aboard your ship for a rescue fee.
Downing machines one after another, a few seconds apart, gives you a streak: some shield back and 15% more speed.
Practice
Section titled “Practice”T (or Drone) launches a practice drone that circles ahead of you and fires slow bolts. It pays nothing. The Proving Ground in Earth’s megacity runs waves of machines with simulated damage.